
This page shows step by step how to set up Google Consent Mode v2 with Beautiful Cookie Banner, with three example configurations and the result in Google’s Tag Assistant. For the background (what Consent Mode v2 is, basic and advanced mode, what the plugin sends), read Google Consent Mode v2 for WordPress first.
Disclaimer: this page describes the technical setup only. It is not legal advice.
Before you start
- The Premium add-on is installed and activated.
- Your banner and its categories are set up (tab Compliance & Behaviour, see compliance types explained).
- Your Google tags are set up, ideally in Google Tag Manager. For basic mode, make sure they fire only after consent, with service blocking or dataLayer triggers.
Step 1: Enable Google Consent Mode
Go to Settings > Cookie Consent Banner > Consent APIs > Google Consent Mode and check Enable Google Consent mode. From then on, every consent type is sent as denied unless you map it to a category.
Step 2: Map banner categories to consent types
For each consent type, switch on the banner categories that grant it. The required types for Google Ads and Analytics are:
analytics_storagead_storagead_user_data(new in v2)ad_personalization(new in v2)
A consent type is granted as soon as one of its categories is allowed. It is granted by default (before the visitor chooses) if one of its categories is “default checked” in Compliance & Behaviour.
Step 3: Example configurations
The screenshots of the results were taken with Tag Assistant.
Example 1: Banner 1, compliance type “Differentiated Consent”
Compliance settings
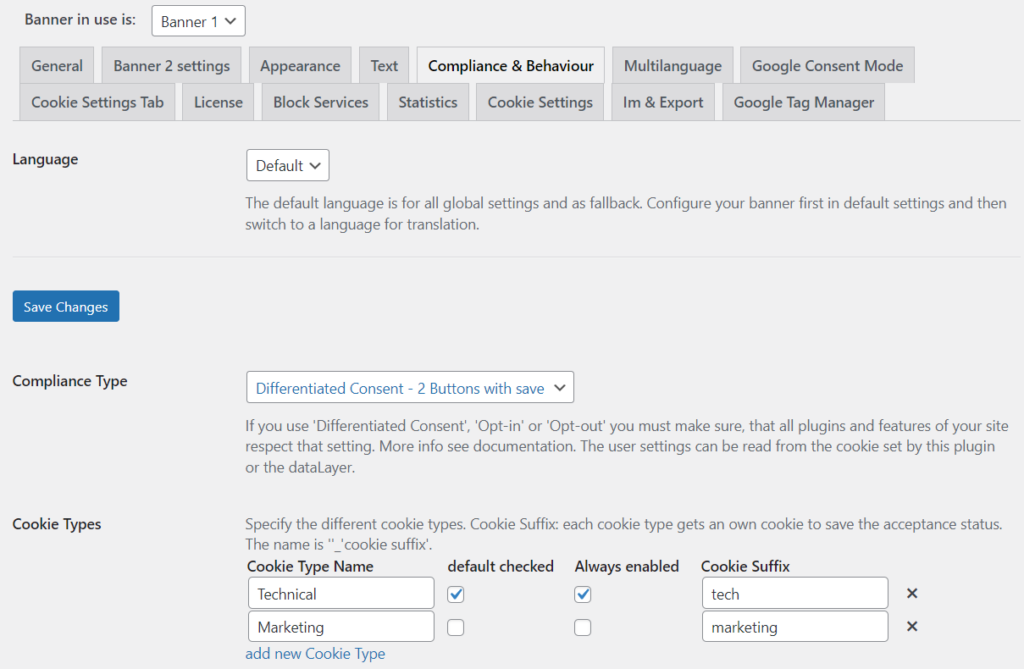
Consent Mode settings
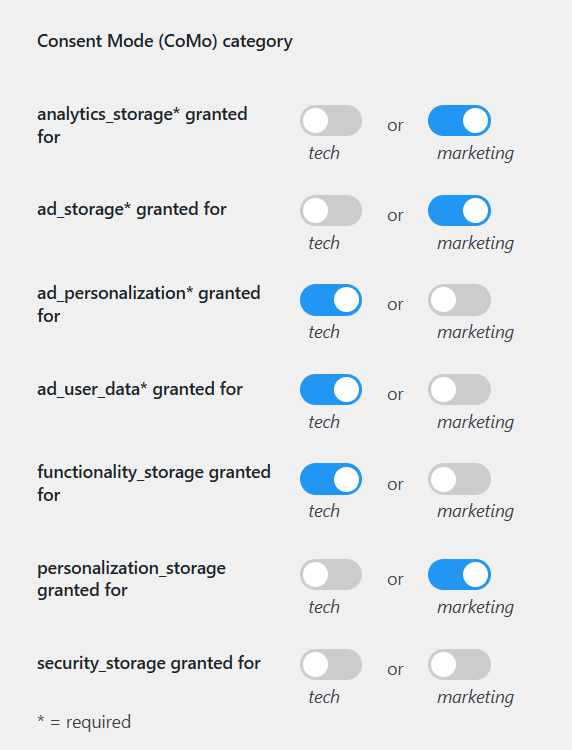
Result
On the first page load:
- analytics_storage: denied
- ad_storage: denied
- ad_personalization: granted
- ad_user_data: granted
- functionality_storage: granted
- personalization_storage: denied
- security_storage: denied
ad_personalization, ad_user_data and functionality_storage are granted because tech is “default checked”. If the visitor now allows marketing, everything except security_storage is granted.
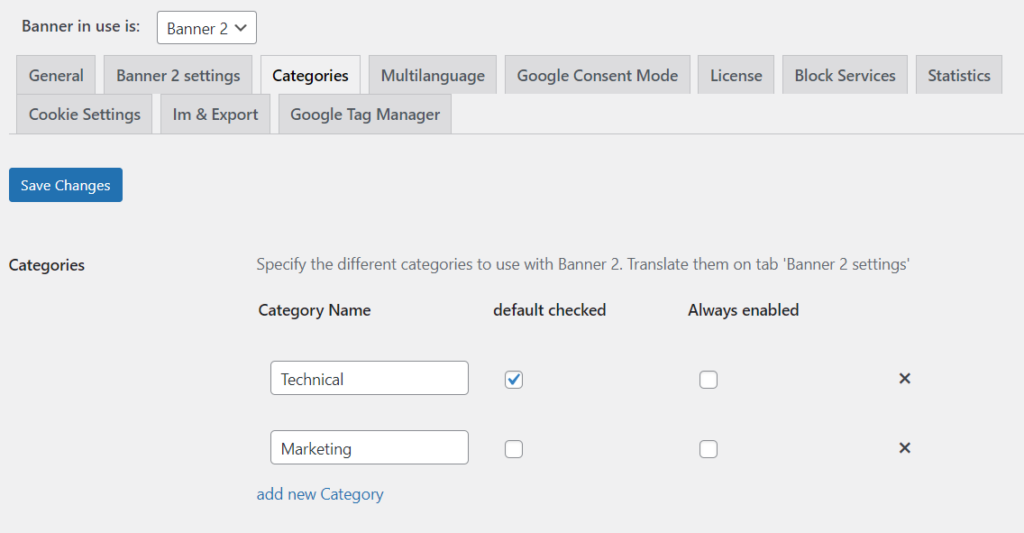
Example 2: Banner 2
Compliance settings
Consent Mode settings
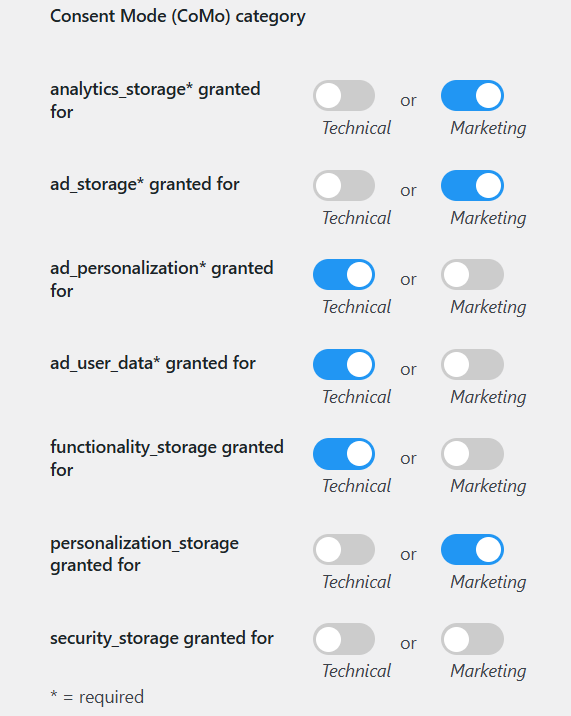
Result
On the first page load:
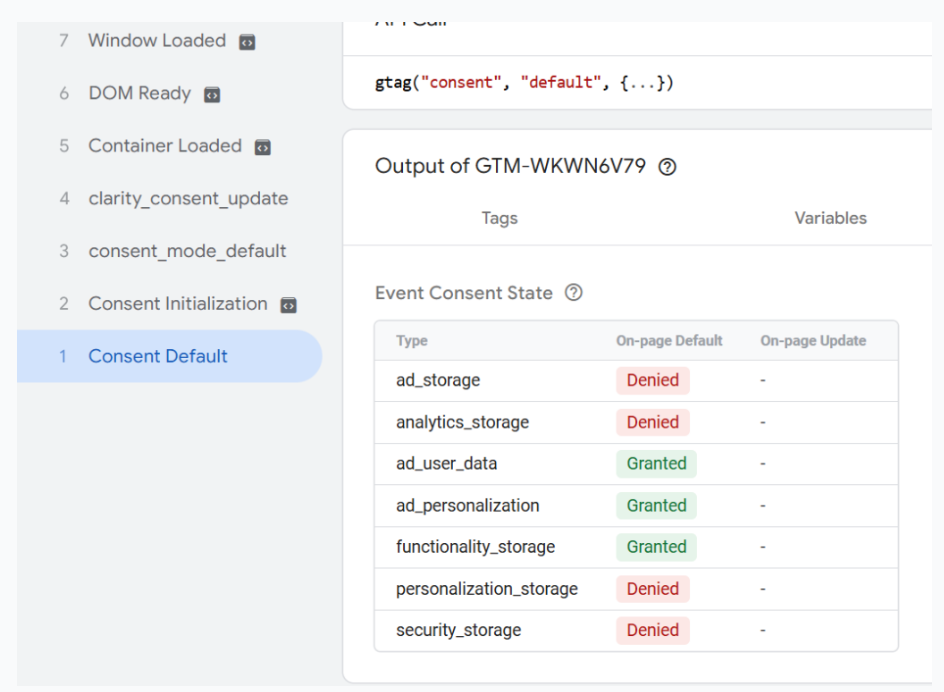
ad_personalization, ad_user_data and functionality_storage are granted because Technical is “default checked” in the categories settings. If the visitor now allows Marketing, everything except security_storage is granted.
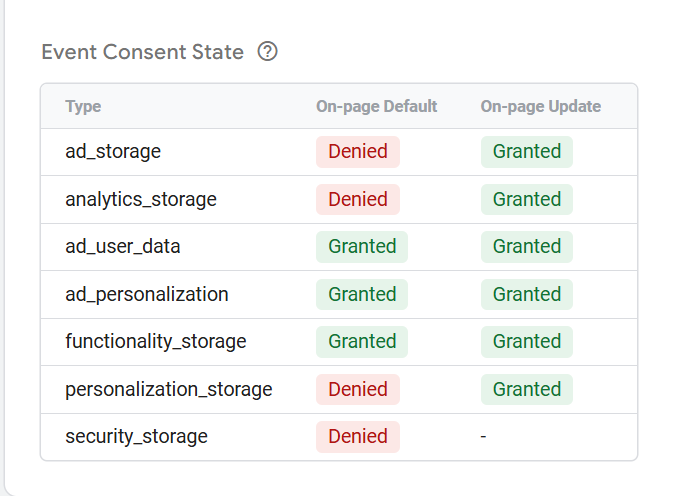
On the visitor’s next page view, the default is still “denied”, but the update with “granted” comes immediately after the default:
Example 3: Banner 1, compliance type “Opt-in”
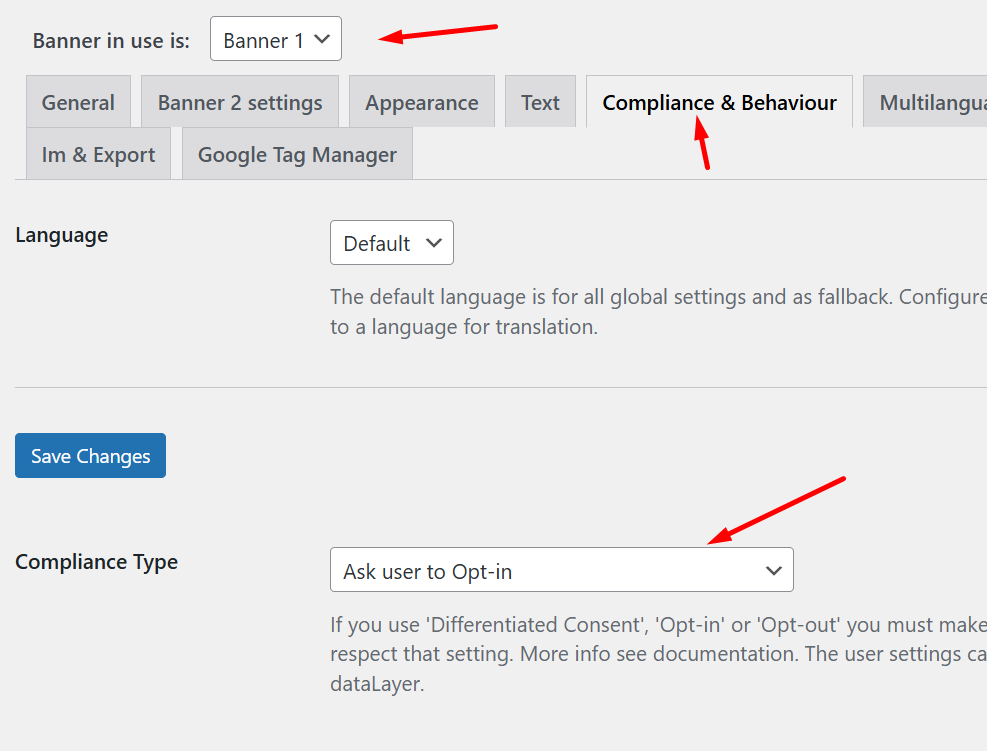
Compliance settings
Consent Mode settings
Result
On the first page load:
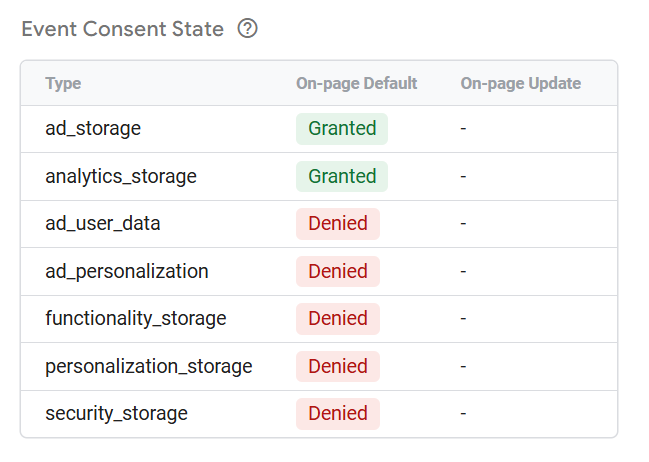
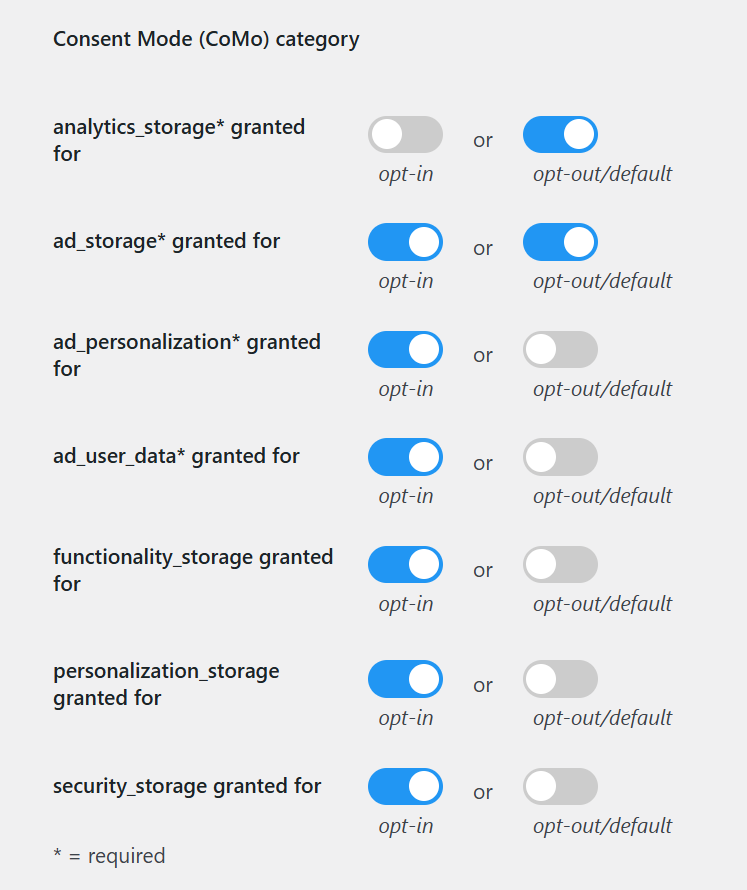
analytics_storage and ad_storage are granted because their toggles are on for “opt-out/default”.
If the visitor now opts in, everything except analytics_storage is granted. analytics_storage changes to “denied” because only its “opt-out/default” toggle is on, not the “opt-in” one. In practice you usually switch on both toggles.
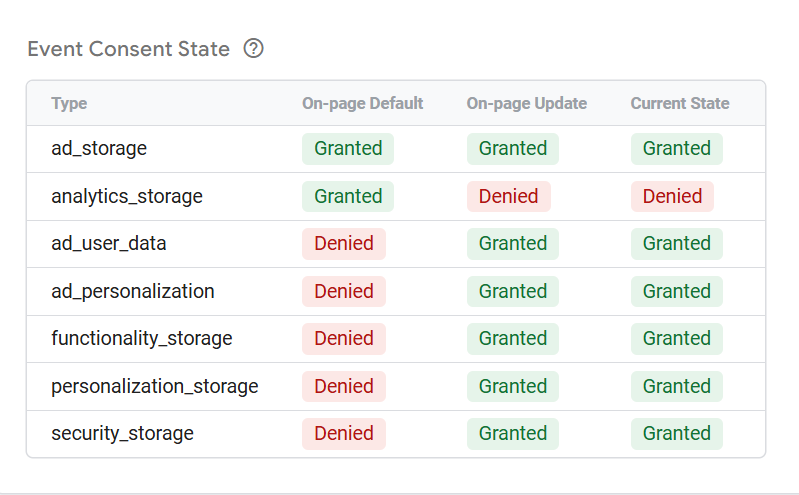
On the visitor’s next page view, the default is still “denied”, but the update with “granted” comes immediately after the default:
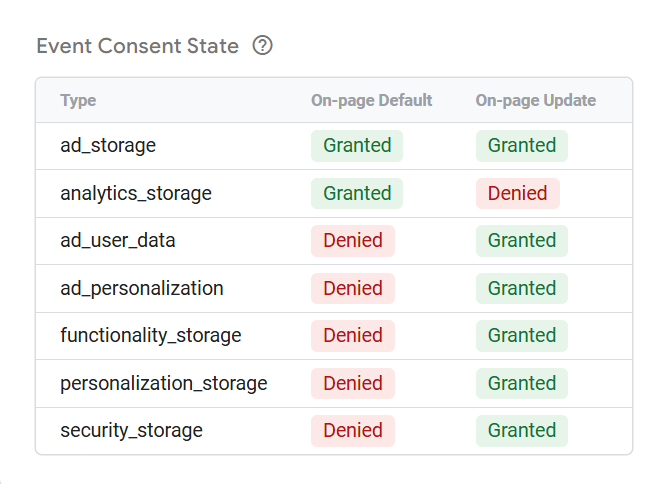
Step 4: Check the result
Your tags still fire the way you configured them; their requests now carry the consent state. Check it with the guide How to test and check Google Consent Mode v2.