
Microsoft Clarity records sessions and heatmaps of your visitors. If your Clarity project requires cookie consent, Clarity needs a consent signal from your site to set its cookies. Microsoft requires this signal for visits from the European Economic Area, the UK and Switzerland.
With the Premium add-on, Beautiful Cookie Banner sends this signal through the Clarity Consent API. Since add-on version 5.0.0 it uses ConsentV2, the version Microsoft recommends; the older API is being phased out.
How the Clarity Consent API works
ConsentV2 has two values, each granted or denied:
window.clarity("consentv2", {
  ad_Storage: "granted",
  analytics_Storage: "granted"
});- Granted: Clarity sets its cookies and connects page views across a session.
- Denied: Clarity runs without cookies and treats each page view on its own. When a visitor withdraws consent, Clarity deletes its cookies.
Beautiful Cookie Banner sends the call in the <head> on every page with the stored choice, and again straight away when the visitor changes the choice in the banner. If both values are denied, it also sends window.clarity("consent", false), so cookies set earlier are removed.
1. Enable the Clarity Consent API
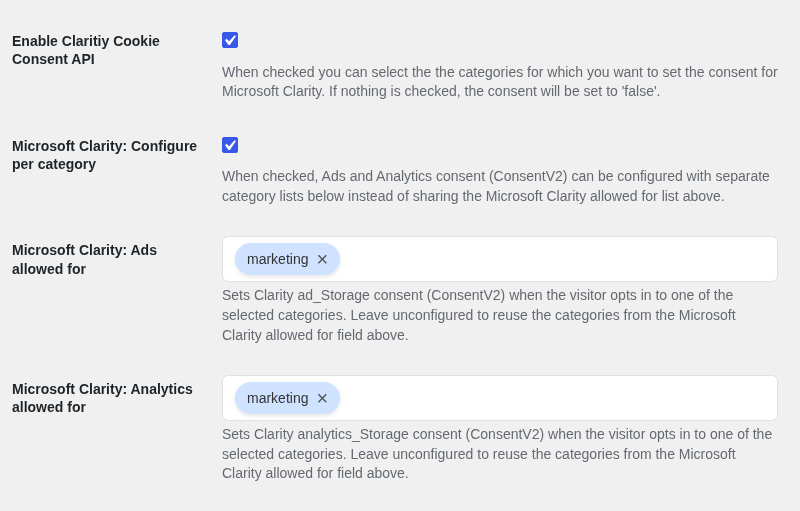
Go to Settings > Cookie Consent Banner > Consent APIs > Microsoft Consent Mode and check Enable Claritiy Cookie Consent API.
2. Choose the consent categories
In Microsoft Clarity allowed for, pick the banner categories that allow Clarity. Clarity gets granted as soon as the visitor allows one of them.
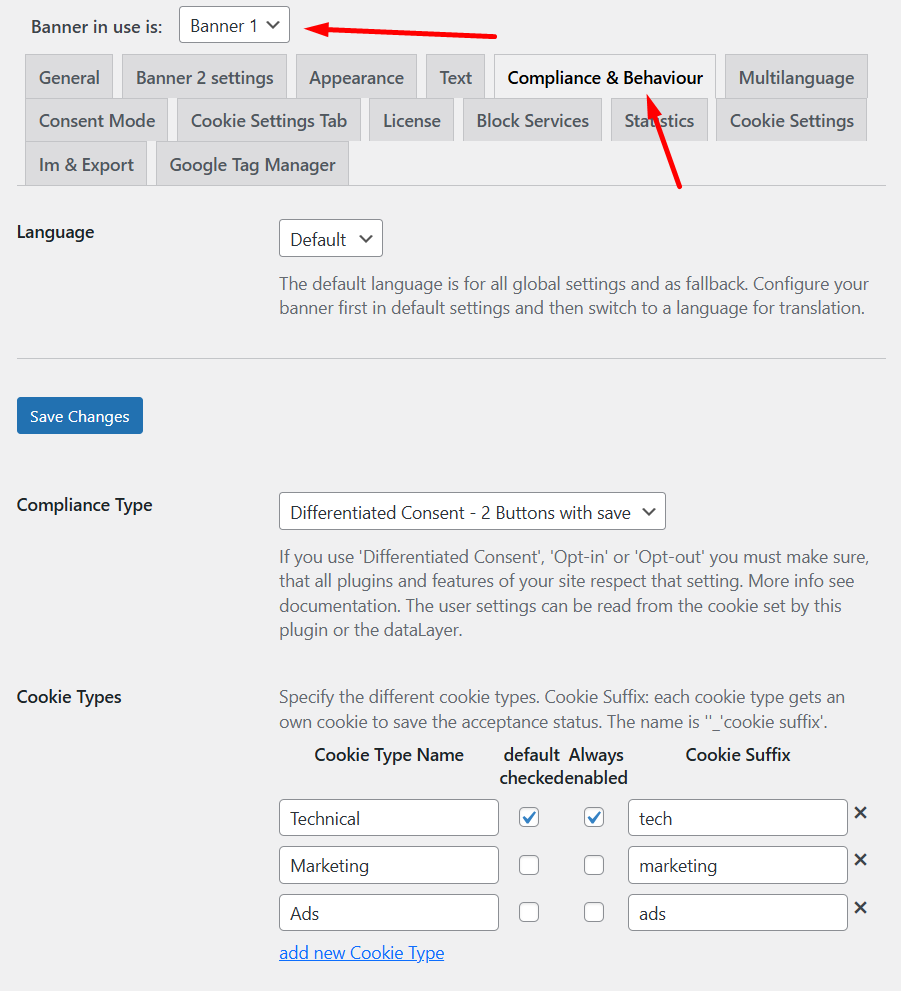
If you want different categories for ad_Storage and analytics_Storage, check Microsoft Clarity: Configure per category and fill in Microsoft Clarity: Ads allowed for and Microsoft Clarity: Analytics allowed for. Without this option, both values use the same list.
The categories you can choose depend on your compliance type and your cookie categories. In the examples below, the Compliance & Behaviour tab looks like this:
Configuration examples
The examples use the field Microsoft Clarity allowed for (one list for both values).
Example 1: technical category, always on
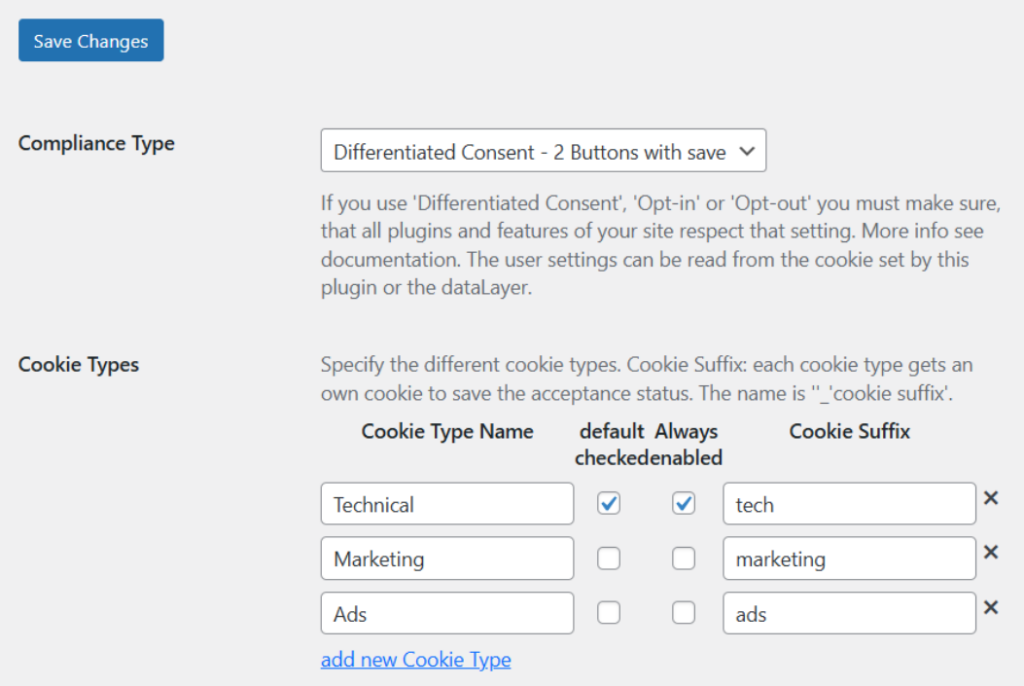
Compliance settings
Clarity settings
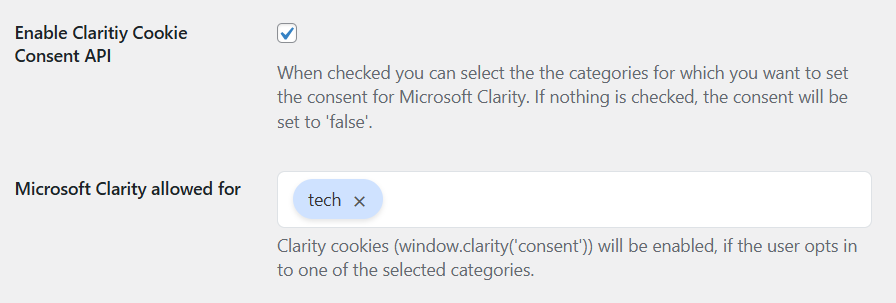
Result
Clarity is always allowed: “tech” is “default checked” and “always enabled”, so the visitor can never switch it off.
Example 2: marketing or ads
Compliance settings
Clarity settings

Result
On the first page load Clarity is not allowed, because neither “marketing” nor “ads” is “default checked”. Clarity is allowed as soon as the visitor accepts ads or marketing cookies.
Example 3: Banner 2
Compliance settings
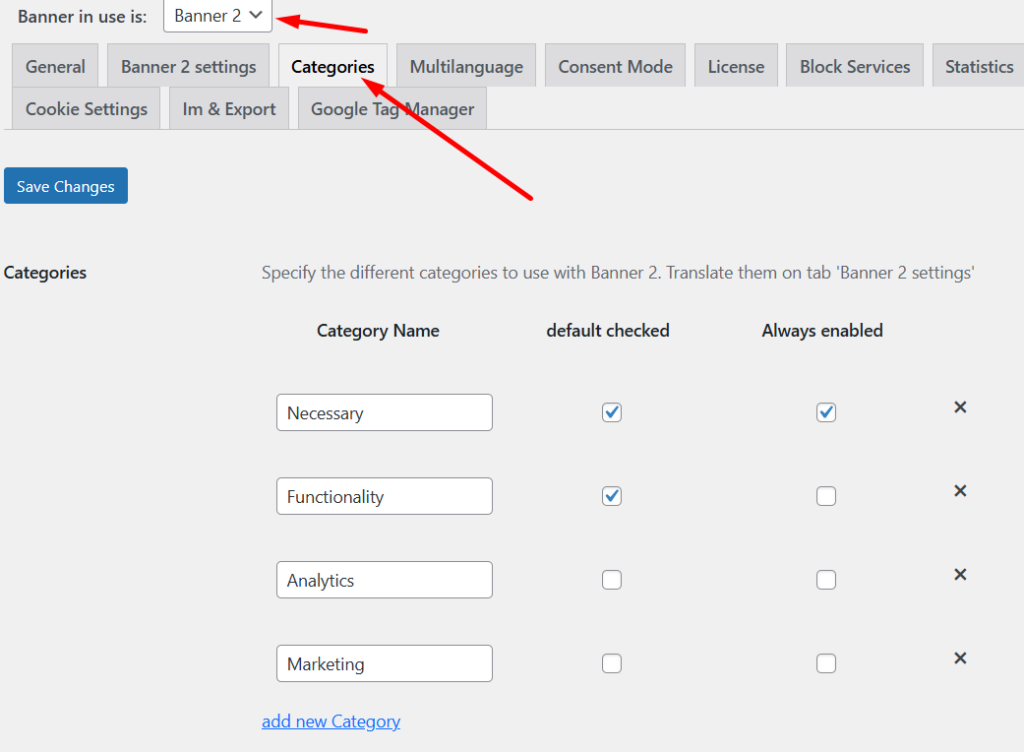
Clarity settings

Result
On the first page load Clarity is allowed, because “Functionality” is “default checked”. It stays allowed as long as the visitor allows “Functionality” or “Analytics”.
Example 4: Banner 1, compliance type opt-in
Compliance settings
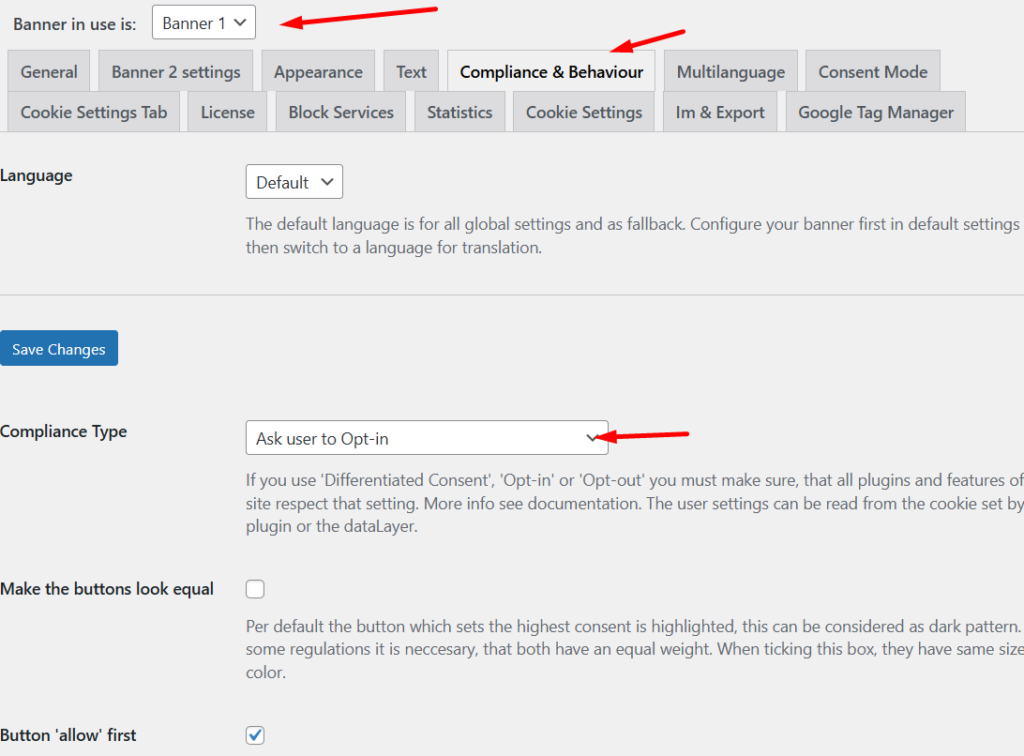
Clarity settings

Result
On the first page load Clarity is not allowed. It is allowed only after the visitor opts in.
Example 5: Banner 1, compliance type opt-out
Compare this carefully with example 4: the important difference is the compliance type.
Compliance settings
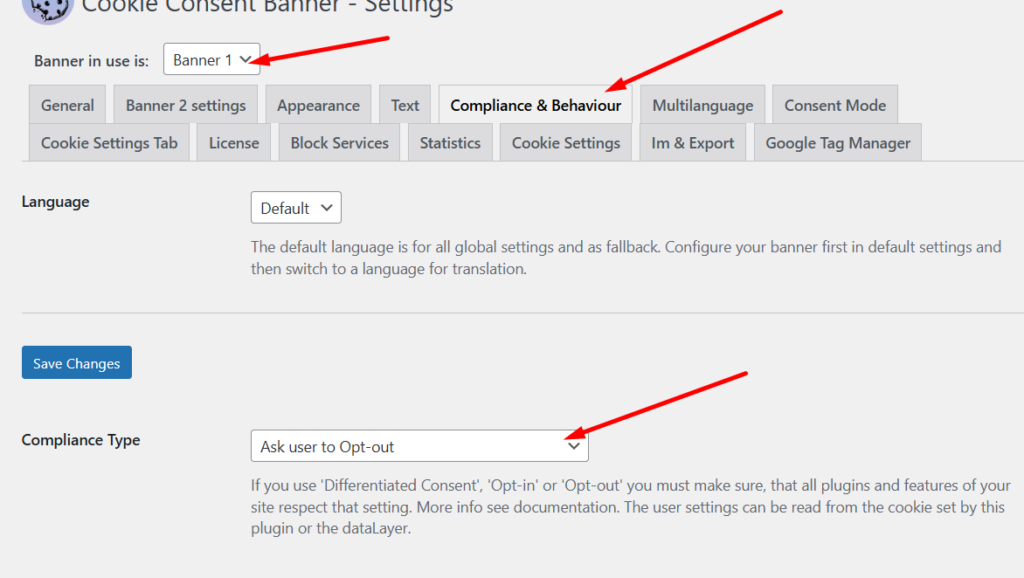
Clarity settings

Result
On the first page load Clarity is allowed, because with the compliance type “opt-out” every visitor counts as opted in until they opt out. Clarity stays allowed until the visitor opts out.
How to test
Open your site in a private browser window. Every time the Clarity consent is set, the plugin also pushes an event to the Google dataLayer. Type this in the browser console:
dataLayerand look for the entry with event: "clarity_consent_update". Its value clarityAllowed is true or false.
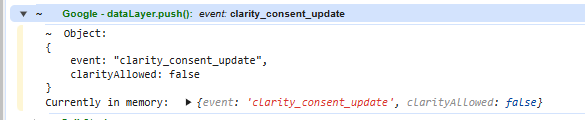
You can also look at the queue that the Clarity script reads:
window.clarity.qIt contains the consentv2 call with the current ad_Storage and analytics_Storage values (once the Clarity script has loaded, it processes the queue).