The WordPress plugin “Beautiful Cookie Consent Banner” stores a user’s permission settings in one or more cookies. But how can you ensure that your analytics tools correctly detect and respect those consent choices?
First things first: if your website uses any kind of front-end tracking, you should strongly consider using Google Tag Manager (GTM). GTM provides significantly more control, flexibility, and transparency over your tracking implementation.
For the most reliable setup, it’s recommended to use the plugin’s built-in option to load the Google Tag Manager container. This ensures that events fire in the correct order and allows you to easily prevent GTM from running unless the necessary consents have been granted.
Alternatively, you may use plugins such as:
https://wordpress.org/plugins/duracelltomi-google-tag-manager/
This plugin also provides a ready-to-use dataLayer, making the setup more convenient. However, in this case, you should verify that the event order is correct to ensure that the consent information is available.
Prerequisites
- Install Cookie Consent Banner
- Install Google Tag Manager. You can use the plugin’s built-in functionality to load the GTM container. For that add you GTM id to the GTM ID field in the Google Tag Manager tab.
- In the Cookie Consent Banner plugin, enable “Push consent event to dataLayer” in the Google Tag Manager tab.
- Ensure the Cookie Consent Banner plugin is activated in the General tab.

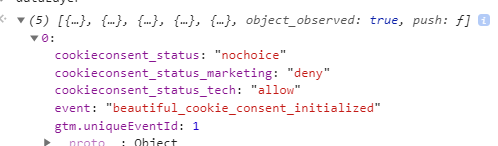
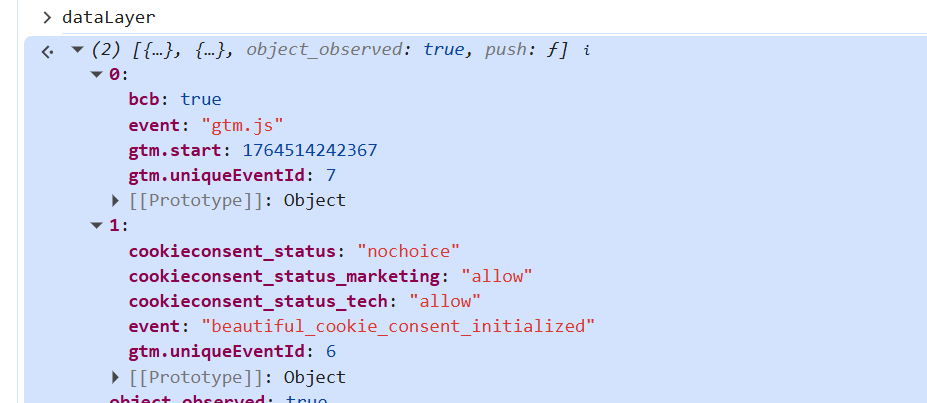
If you go now to to your page and open the browser console and type dataLayer. Search for the event beautiful_cookie_consent_initialized. It should look something like this:
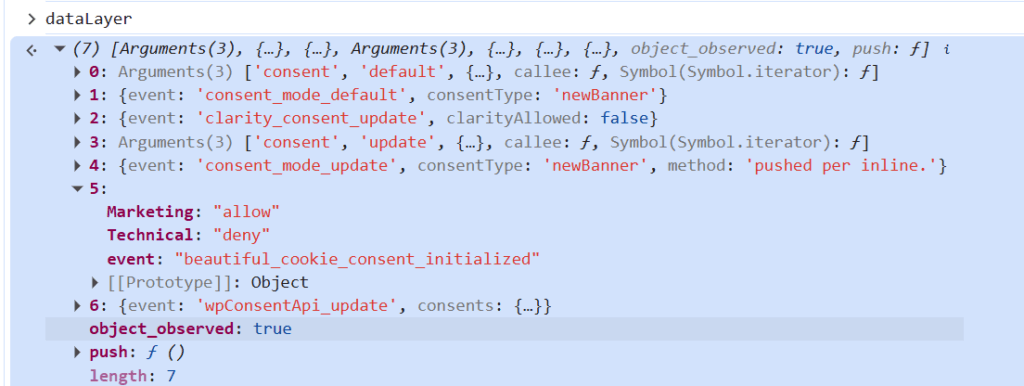
Banner 1

Banner 2
Configure Google Tag Manager
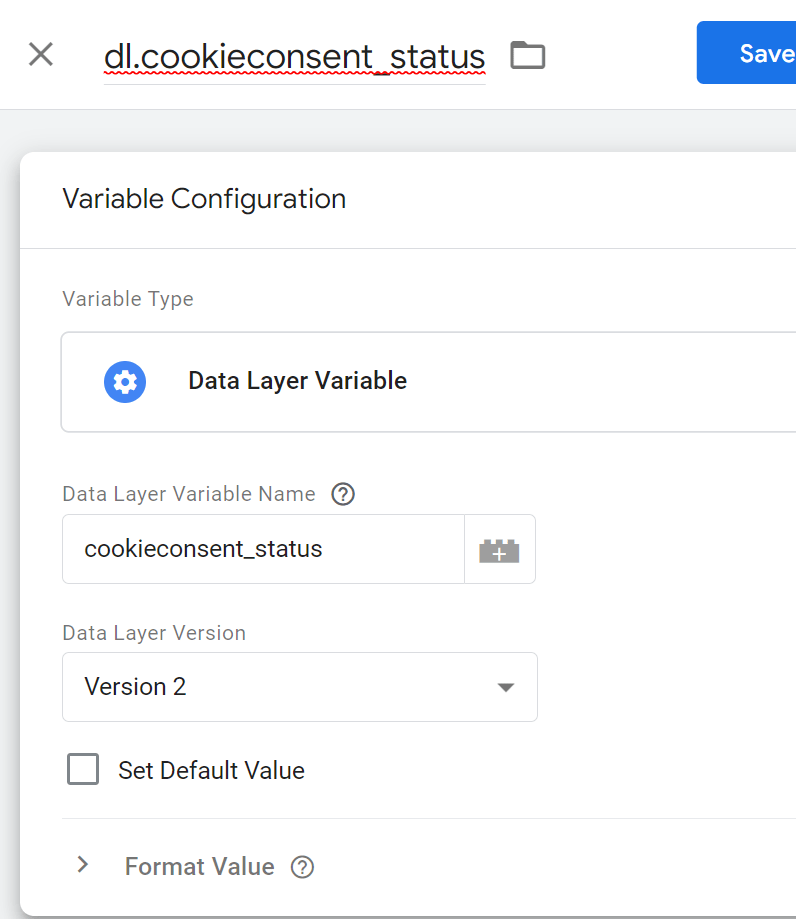
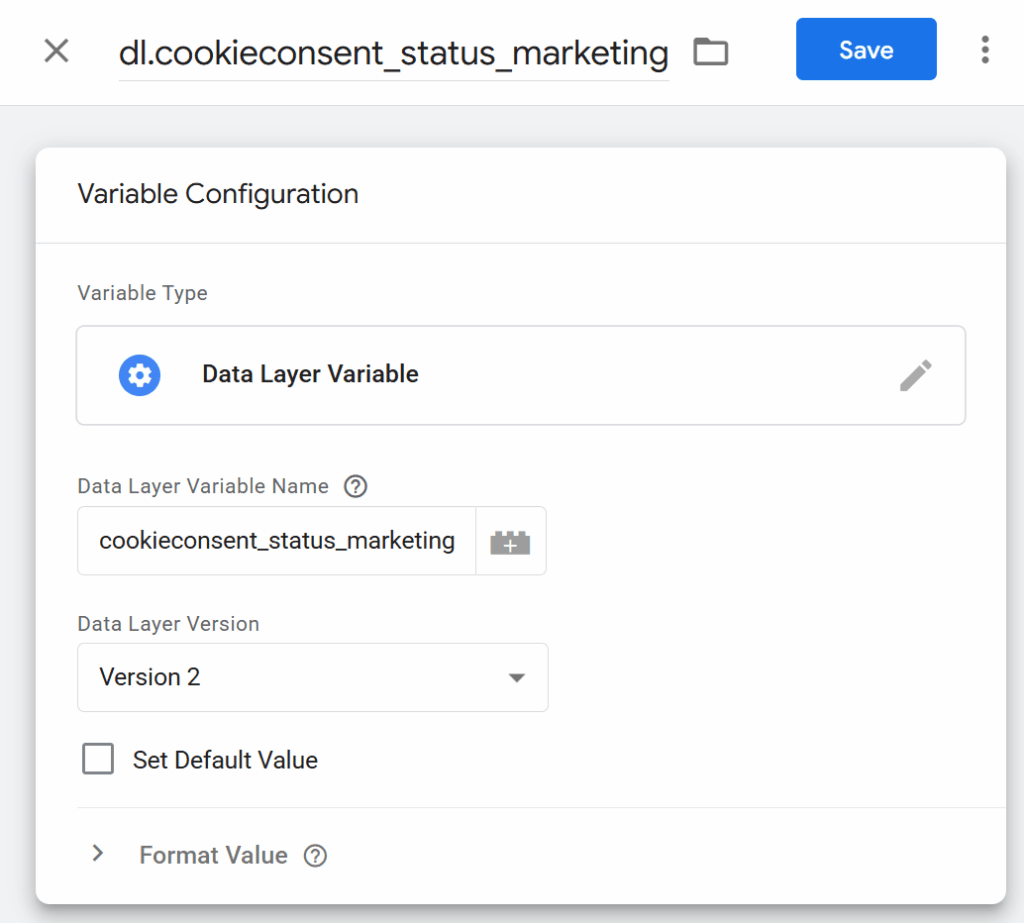
Now as we have the events in the dataLayer we can easily use them in Google Tag Manager. For this we need to set up some DataLayer Variable in Google Tag Manager.
Simple Consent Set Up
This example uses the values for Banner 1. There is no simple consent for banner 2.
Create a custom variable
Create a blocking trigger
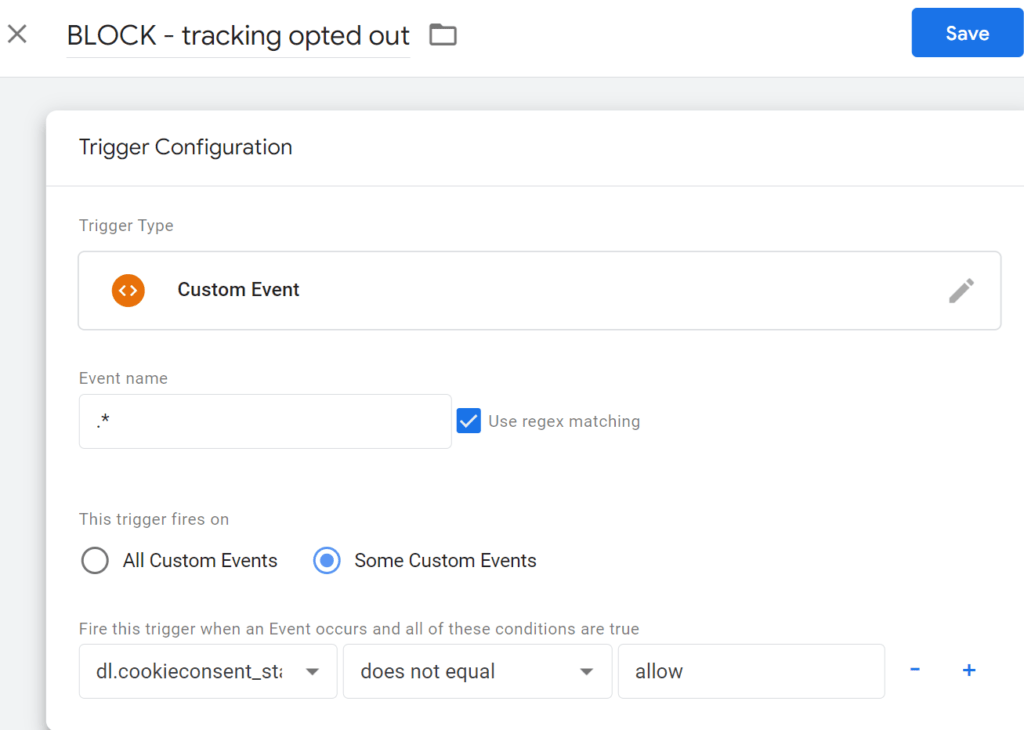
The negation of “does not equal” adds an additional layer of security. It ensures that the trigger will only be unblocked when the user has explicitly provided consent.
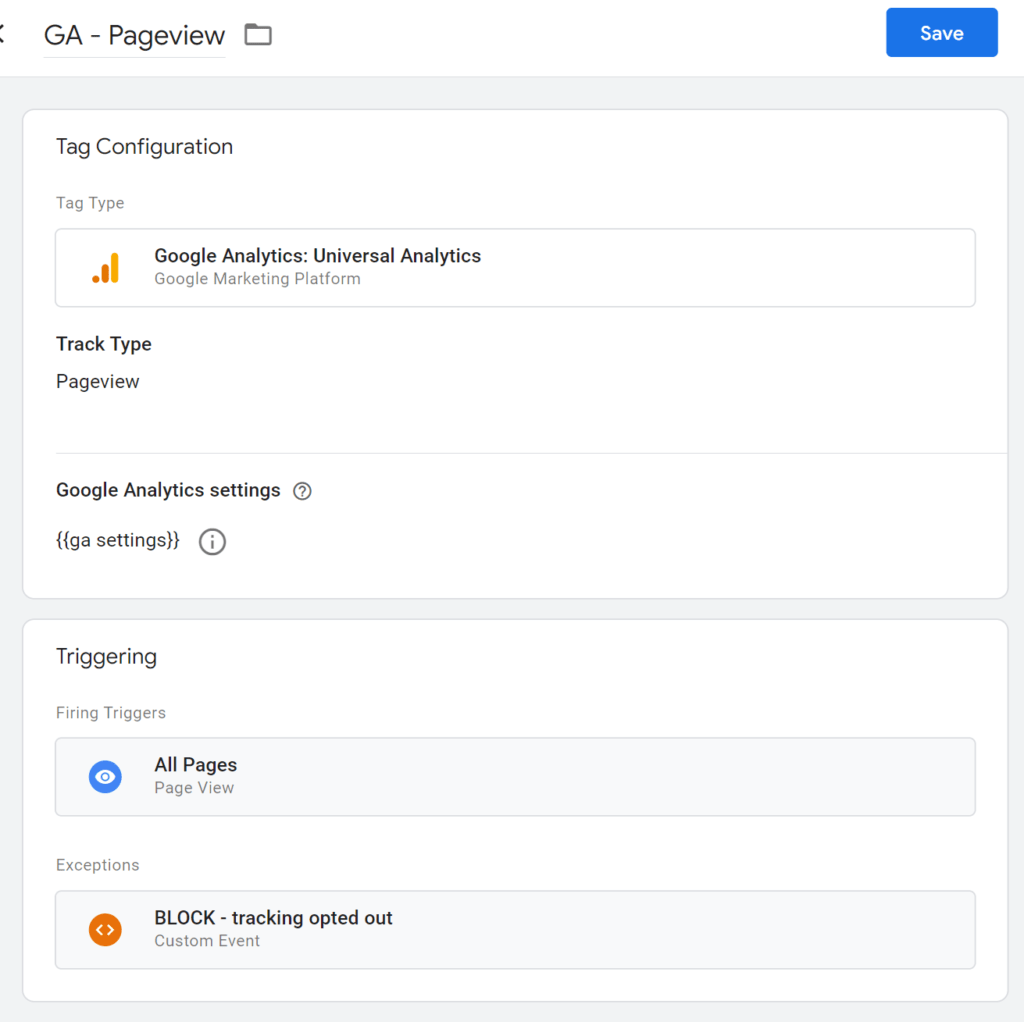
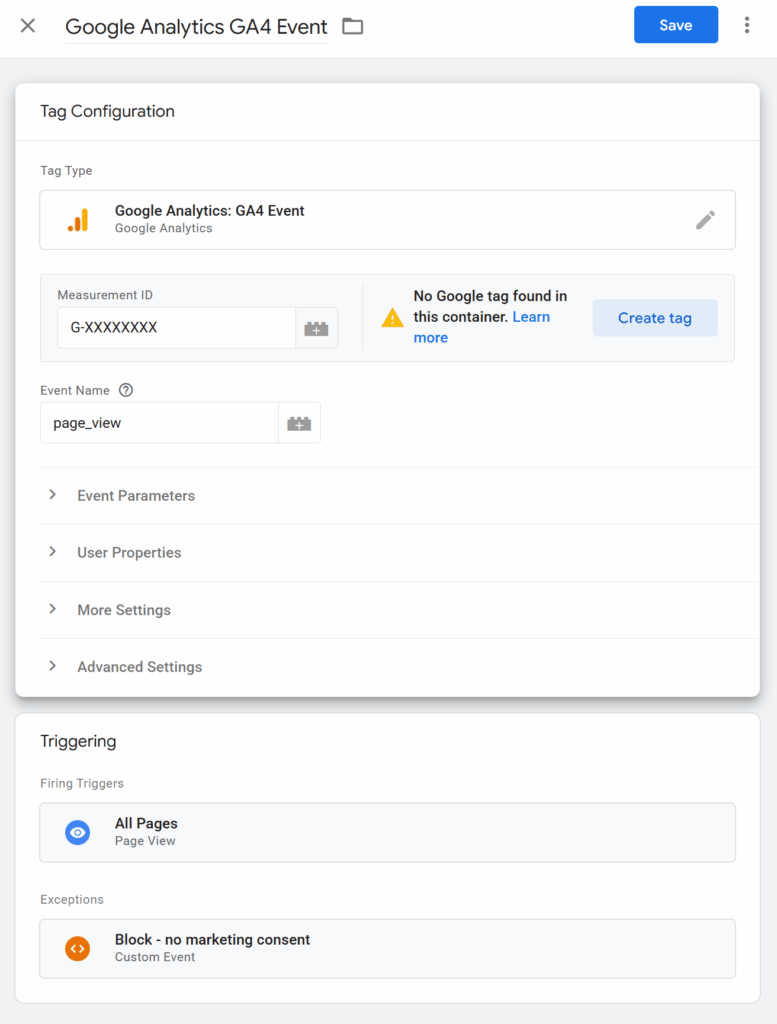
Add the blocking trigger to tags
Add the blocking trigger as exception rule to all tags you do not want to fire, if the user has not opted in.
IMPORTANT
Make sure, that the order of events in the dataLayer are correct. In this example we use the built in “All Pages” trigger. This will only work if the banner event “” is pushed to the dataLayer before the “All Pages” Event (gtm.js)
✅ WORKS:
gtm.js is AFTER beautiful_cookie_consent_initialized
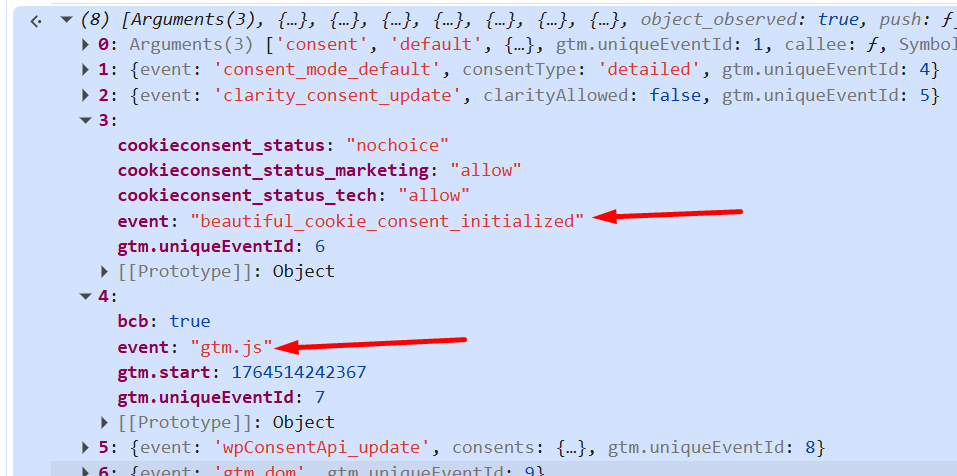
❌ NOT WORKING
gtm.js is BEFORE beautiful_cookie_consent_initialized
Differentiated Consent Set Up & Banner 2
This set up is very similar to the “simple consent set up”. The main difference is here that you use the cookie types as variables. For Banner 1 this is if your Compliance Type is “Differentiated Consent …”, and always for Banner 2.
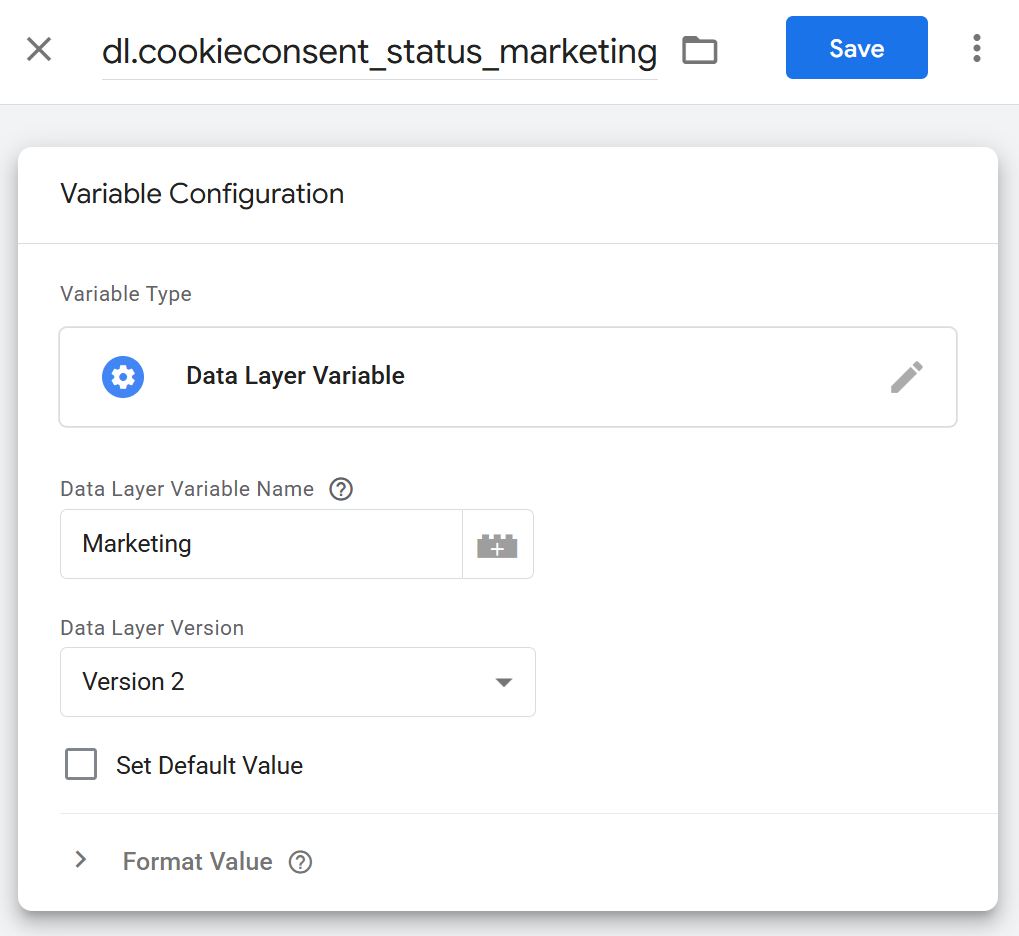
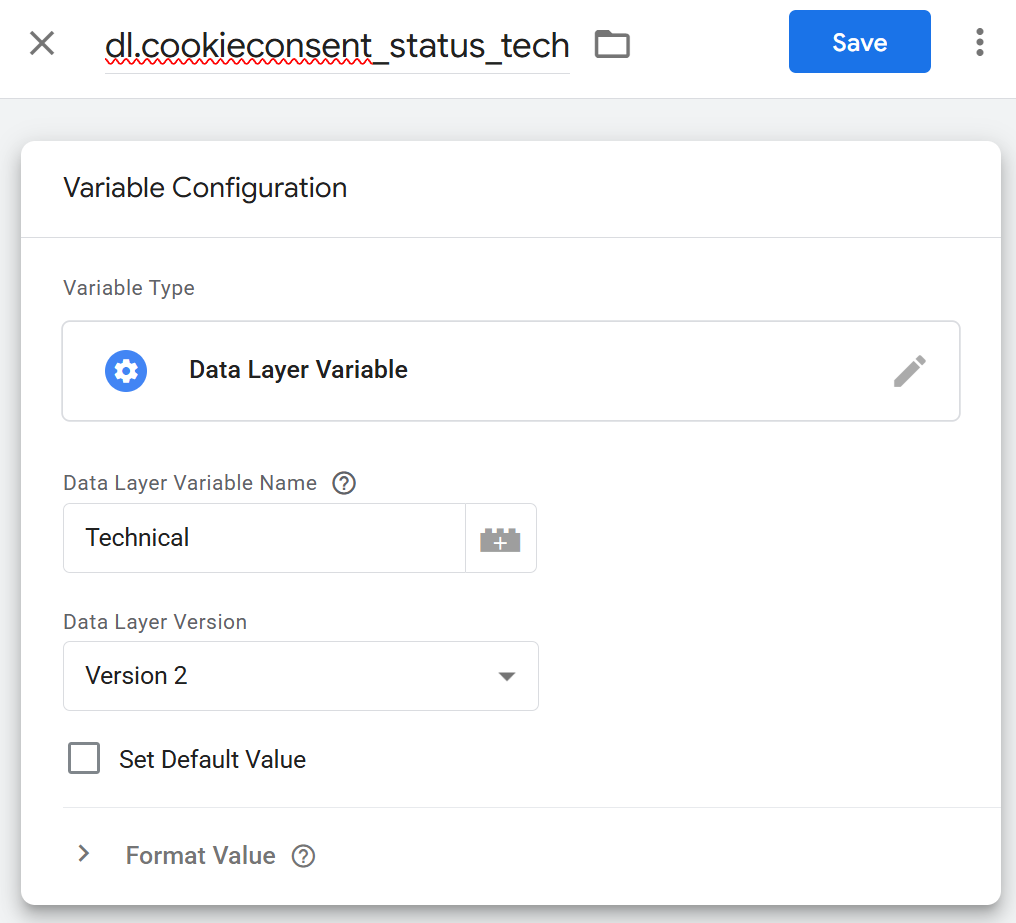
Create custom variables
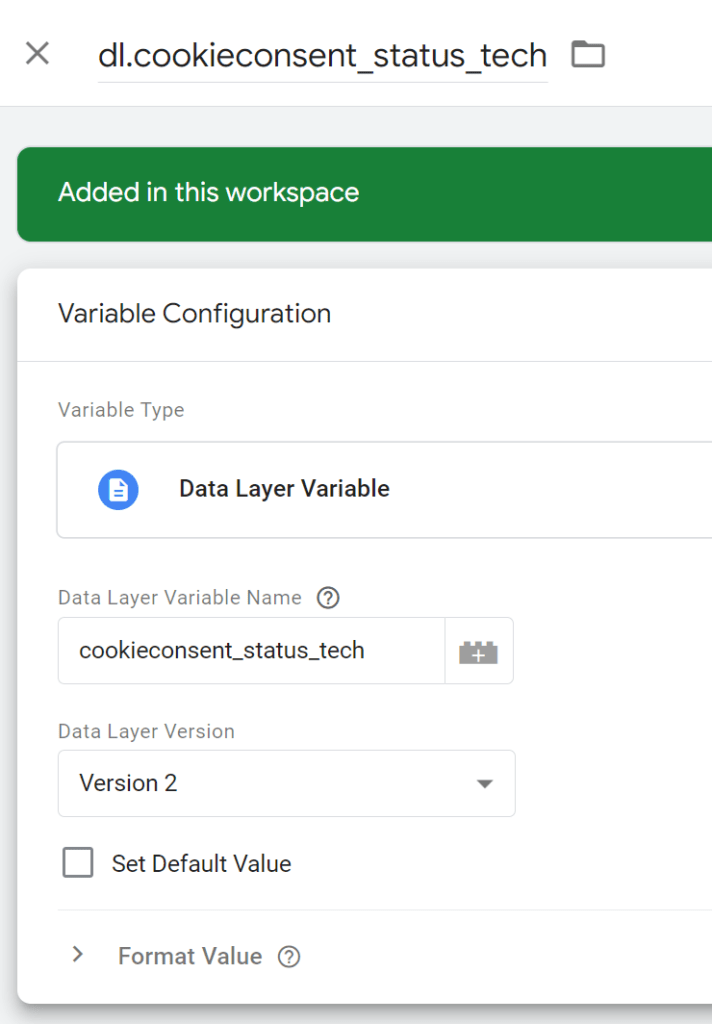
Create custom variables for all your cookie types. In our example we only have two: tech and marketing.
Banner 1
Banner 2
The only difference is the Data Layer Variable Name.
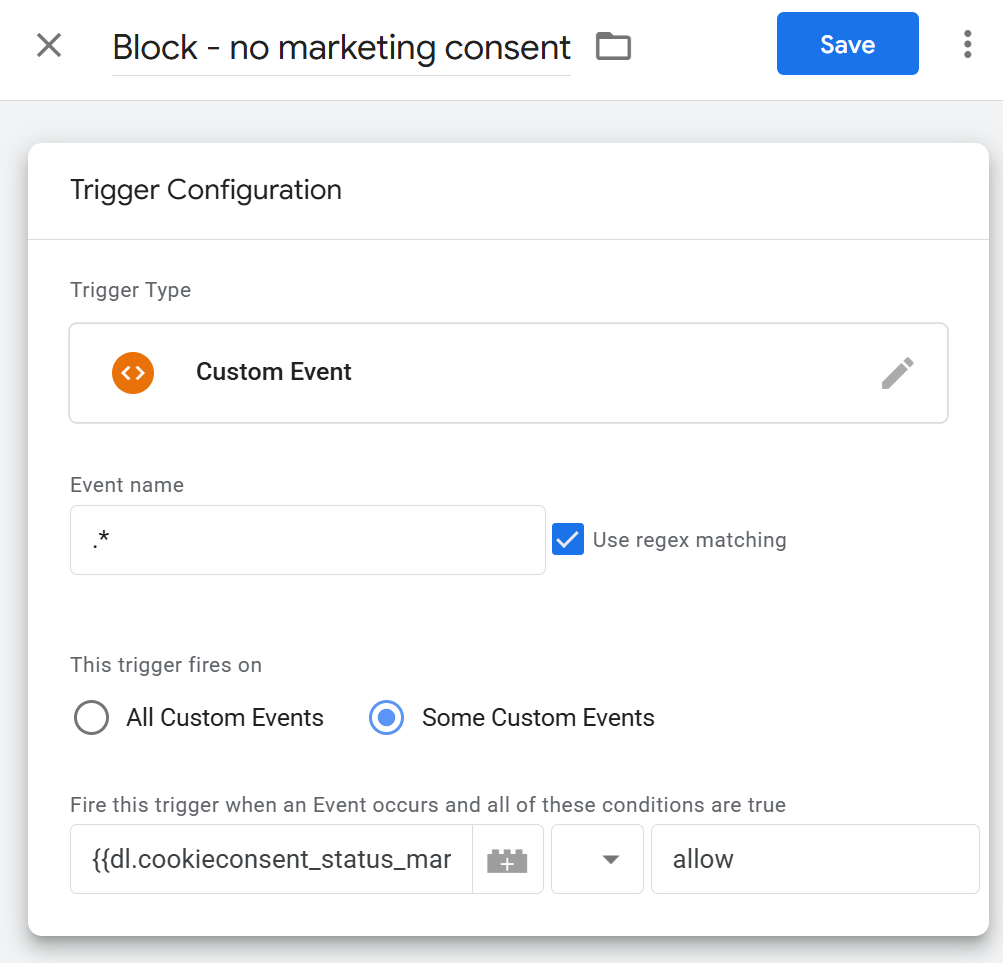
Create blocking triggers
Here as an example for the marketing cookie type
Add the blocking trigger to tags
Now add your created blocking triggers to the tags, which shall only fire if the user has consented to that cookie type.
See here how to create an hit after the user updated his settings. In this example I use a Google Analytics tag as example as well: https://beautiful-cookie-banner.com/google-tagmanager-fire-tags-on-cookie-banner-update/